
In the realm of video production and streaming, one software has emerged as a game-changer - OBS, or Open Broadcaster Software. This powerful tool has revolutionized the way we create and share content, enabling anyone with a computer to produce high-quality videos. But to truly harness the power of OBS, it's crucial to understand its optimal settings. These settings can make the difference between a mediocre video and a professional-grade production. In this article, we'll delve into the world of OBS, exploring its origins, key features, and how to set it up for recording top-quality videos. We'll guide you through the process, ensuring you have the knowledge and skills to produce the best possible video content. So, whether you're a seasoned content creator or a beginner looking to dip your toes into the world of video production, this guide is for you.

Understanding OBS
What is OBS?
OBS, or Open Broadcaster Software, is a free and open-source software for video recording and live streaming. Born out of a desire for a more versatile and customizable streaming software, OBS was created by Hugh "Jim" Bailey in 2012. Since then, it has grown exponentially, becoming a favorite among content creators worldwide. Its open-source nature means that it's constantly evolving, with developers around the globe contributing to its growth and improvement. OBS is not just a recording tool; it's a powerful broadcasting studio right at your fingertips. It allows you to mix and match different video sources, add transitions, manage audio, and much more. With OBS, the possibilities are limited only by your imagination.
Key Features of OBS
OBS is packed with features that make it a versatile tool for video production. One of its core functionalities is the ability to create and manage 'Scenes'. Think of a scene as a canvas where you can arrange your video sources. You can have multiple scenes and switch between them seamlessly during a live stream or recording. Another key feature is 'Sources'. These are the different elements that you can add to a scene, such as video capture devices, audio inputs, images, text, and even other scenes. OBS also boasts a powerful 'Audio Mixer' that allows you to manage the audio sources in your scene, adjust volume levels, and apply filters. Additionally, OBS offers a variety of 'Transitions' that you can use when switching between scenes, adding a professional touch to your videos. Lastly, OBS provides a range of 'Filters' that you can apply to your sources, allowing you to adjust color, add effects, crop images, and more. These features, combined with its open-source nature, make OBS a powerful tool for any content creator.
Setting Up OBS for Recording
Initial Setup and Interface Overview
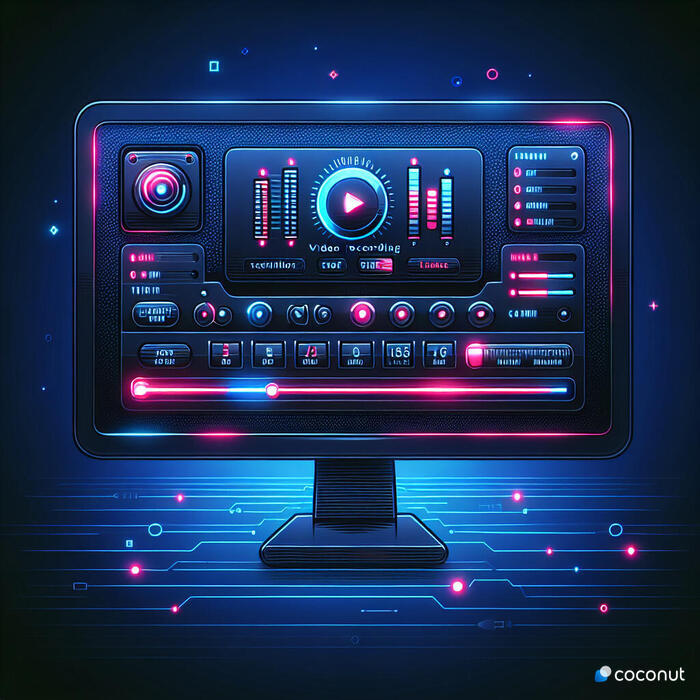
Setting up OBS for recording is a straightforward process. After downloading and installing the software, you'll be greeted with the main interface. This is where you'll manage your scenes, sources, audio mixer, transitions, and settings. The interface is divided into several sections. On the bottom left, you'll find the 'Scenes' and 'Sources' panels. This is where you'll create and manage your scenes and add sources to them. On the bottom right, you'll find the 'Audio Mixer' and 'Controls' panels. The Audio Mixer allows you to manage your audio sources, while the Controls panel contains buttons for starting and stopping streams or recordings, switching to studio mode, and accessing settings. The center of the interface is occupied by the 'Preview' and 'Program' screens. The Preview screen shows the current scene, while the Program screen shows what's being broadcast or recorded. Now that we've covered the basics, let's dive into the settings and how to optimize them for recording top-quality videos.

A Step-by-Step Guide on Installing OBS and Navigating Through Its Interface
Welcome to the world of OBS (Open Broadcaster Software), a free and open-source software for video recording and live streaming. We're here to guide you through the initial setup process and give you a tour of the OBS interface. Let's start with the installation. First, visit the OBS Project website and download the version that suits your operating system. Once downloaded, run the installer and follow the prompts. It's as simple as that! Now, let's open OBS and explore its interface. The OBS interface is divided into five main sections: Scenes, Sources, Audio Mixer, Scene Transitions, and Controls. The 'Scenes' section is where you create and manage different recording environments. Each scene can have multiple 'Sources', which are the different inputs like game capture, window capture, image, text, and so on. The 'Audio Mixer' allows you to control the audio levels of your sources, while 'Scene Transitions' lets you choose how to switch between your scenes. Lastly, the 'Controls' section is where you start and stop your stream or recording, set up your settings, and exit the program. It might seem overwhelming at first, but don't worry! We'll walk you through each section and explain how to use them effectively. Remember, OBS is a powerful tool, and with a bit of practice, you'll be able to create high-quality video content in no time.
Video Settings for Maximum Quality
Now that we've covered the basics of the OBS interface, let's dive into the video settings. The first thing you'll want to set is your 'Base (Canvas) Resolution'. This is the resolution of your screen or the resolution you want your viewers to see. Next, set your 'Output (Scaled) Resolution'. This is the resolution of the video that OBS will output. If your computer or internet connection can't handle high resolutions, you can lower this setting. The 'Downscale Filter' is another important setting. This determines how OBS scales your video if your Output Resolution is lower than your Base Resolution. There are three options: Bilinear, Bicubic, and Lanczos. Bilinear is the fastest but provides the lowest quality, while Lanczos is slower but provides the highest quality. Bicubic is a good middle ground. Lastly, set your 'FPS (Frames Per Second)'. This is the number of frames that will be displayed per second. A higher FPS will result in smoother video but will require more processing power and bandwidth. If you're just starting out, we recommend setting this to 30 and adjusting as needed.
Audio Configuration for Clarity
Audio is just as important as video when it comes to creating engaging content. In OBS, you can configure your audio settings to ensure clear and crisp sound quality. Start by setting up your audio devices. In the 'Audio' section of the settings, you can select your 'Desktop Audio Device' and 'Mic/Auxiliary Audio Device'. These are the devices that OBS will capture audio from. Once your devices are set up, you can fine-tune your audio settings. The 'Audio Mixer' allows you to adjust the volume levels of your audio sources. You can also use the 'Advanced Audio Properties' to control the balance, sync offset, and other settings. Remember, good audio quality can make a big difference in your viewers' experience, so take the time to get it right.

Output Settings for Optimal Recording
The 'Output' settings in OBS control how your video is encoded and saved. There are two output modes: 'Simple' and 'Advanced'. The 'Simple' mode is great for beginners, but if you want more control over your settings, we recommend using the 'Advanced' mode. In 'Advanced' mode, you can set your 'Bitrate', which is the amount of data that is processed per second. A higher bitrate will result in higher quality video but will require more bandwidth. You can also choose your 'Encoder'. The best encoder for you will depend on your hardware and the type of content you're creating. Finally, you can choose your 'Recording Format'. This is the format that your video will be saved in. We recommend using MP4 or MKV, as these are widely supported and offer good quality.
Advanced OBS Configuration
Using Advanced Encoder Settings
If you're looking to fine-tune your video quality and performance, the 'Advanced Encoder Settings' in OBS are worth exploring. These settings allow you to control aspects like 'Rate Control', 'Keyframe Interval', and 'CPU Usage Preset'. 'Rate Control' determines how your bitrate is allocated. 'CBR' (Constant Bitrate) keeps your bitrate consistent, while 'VBR' (Variable Bitrate) allows it to fluctuate based on the complexity of your video. 'Keyframe Interval' sets the frequency of keyframes, which are frames that contain a full image of the video. A lower interval will result in smoother video but will require more processing power. The 'CPU Usage Preset' controls the amount of CPU power dedicated to encoding. A faster preset will use less CPU power but will result in lower quality video. Conversely, a slower preset will use more CPU power but will result in higher quality video. Remember, these settings can significantly impact your video quality and performance, so experiment and find what works best for you.
Scene and Source Optimization
Managing your scenes and sources effectively is key to a seamless recording experience in OBS. Each scene is a collection of sources, and you can switch between scenes during your recording or stream. This allows you to create different layouts or environments for your content. When adding sources to your scenes, consider the order in which they are listed. Sources at the top of the list will appear in front of sources lower down. You can also use filters to modify your sources. For example, you can use the 'Color Correction' filter to adjust the brightness, contrast, and saturation of a source. Transitions are another powerful feature in OBS. These determine how your video switches between scenes. You can choose from a variety of transitions, like 'Cut', 'Fade', and 'Slide', or you can download custom transitions. With a bit of creativity, you can use scenes, sources, and transitions to create a professional and polished video output.

Network Considerations for Smooth Recording
When it comes to achieving smooth recording, network settings play a pivotal role. We often overlook the importance of these settings, but they can significantly impact the quality of your recordings. If you've ever experienced lag or dropped frames during a recording session, it's likely that your network settings were not optimized. The first step in optimizing your network settings is understanding your network's bandwidth. Bandwidth refers to the amount of data that can be transferred over your network at one time. If your bandwidth is too low, you may experience lag or dropped frames during recording. To check your bandwidth, you can use online tools such as speedtest.net. If your bandwidth is low, you may need to upgrade your internet plan or limit other activities that use a lot of bandwidth during recording.Another important network setting to consider is your router's Quality of Service (QoS) settings. QoS settings allow you to prioritize certain types of traffic over others. For example, you can prioritize video recording traffic over other types of traffic to ensure that your recording session runs smoothly. To adjust your QoS settings, you'll need to access your router's settings. The process for doing this varies depending on your router model, so you may need to consult your router's manual or online resources.Lastly, consider using a wired connection instead of a wireless one for recording. Wired connections are generally more stable and less prone to interference than wireless connections. If a wired connection is not possible, try to ensure that your recording device is as close to your router as possible to get the best signal.By understanding and optimizing your network settings, you can significantly improve the quality of your recordings and avoid common issues such as lag or dropped frames.
Troubleshooting Common OBS Issues
Solving Performance Problems
Performance issues with OBS can be frustrating, but they're often easy to resolve once you know what to look for. One common issue is high CPU usage, which can cause lag or dropped frames during recording. If you're experiencing high CPU usage, try lowering your recording settings. For example, you can reduce your video resolution or frame rate. You can also try closing other applications that are running in the background to free up more CPU resources.Another common performance issue is insufficient disk space. OBS requires a certain amount of disk space to store temporary files during recording. If your disk is nearly full, you may experience issues with recording. To resolve this issue, try freeing up disk space by deleting unnecessary files or moving files to an external hard drive.If you're still experiencing performance issues after trying these solutions, it may be worth looking into hardware upgrades. For example, upgrading your CPU or adding more RAM can significantly improve OBS performance. However, hardware upgrades should be considered a last resort, as they can be expensive and time-consuming.Remember, the key to resolving performance issues is to be patient and methodical. Try one solution at a time and test your recording after each change to see if the issue has been resolved. With a bit of patience and perseverance, you can ensure smooth and uninterrupted video recording with OBS.
Audio and Video Sync Issues
Audio and video sync issues can be particularly frustrating, as they can significantly impact the quality of your recordings. However, with a bit of troubleshooting, these issues can often be resolved.One common cause of sync issues is network latency. If your network is slow or unstable, it can cause delays in the transmission of audio or video data, resulting in sync issues. To resolve this issue, try the network optimization tips we discussed earlier.Another common cause of sync issues is incorrect OBS settings. For example, if your audio sample rate in OBS doesn't match the sample rate of your audio device, it can cause sync issues. To resolve this issue, check your OBS audio settings and ensure they match the settings of your audio device.If you're still experiencing sync issues after trying these solutions, it may be worth seeking help from the OBS community. The OBS community is a great resource for troubleshooting and can often provide solutions to even the most obscure issues.Remember, the key to resolving sync issues is to be patient and methodical. Try one solution at a time and test your recording after each change to see if the issue has been resolved. With a bit of patience and perseverance, you can ensure that your audio and video streams are perfectly synced.
Further Readings and Online Resources
5 ADVANCED Features You SHOULD Be Using in OBS Studio
- The Impact of Advanced OBS Settings in Today's Content Creation
- How to Record with OBS (Step-by-Step Tutorial)


